
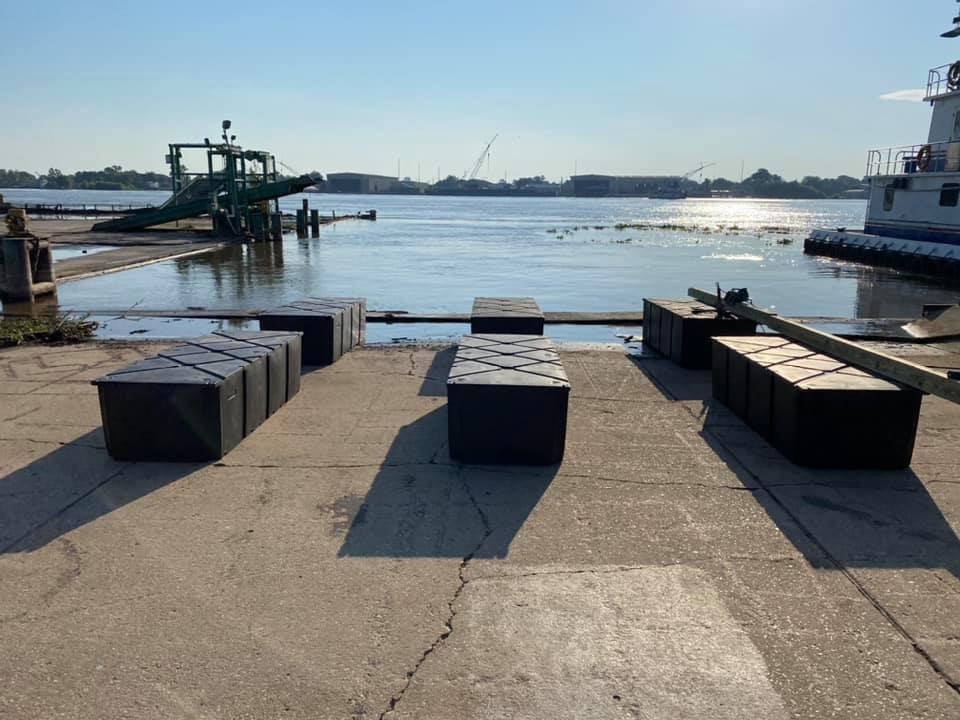
Week one on the camp is done!!!! I can’t believe how much Raymond got done in 3 days!! He has been very hard at work, while I just sit back and stay out of his way!! I promise you he is happier with me not being there asking question or getting in his way. I did go down there and check out the progress like any good boss does hahaha! We are very lucky that we are able to use our family boat dock. This is where all of the Tug Boats are docked when they are not working. We have full power and water there, plus all the heavy machines we need to move things around.
Most of the wood, screws, straps, and floats came from Home Depot. We did pick up a few things from our local lumber store! All of the details and daily progress is listed below. But first……
I’ve been asked by a few of my friends in the north “What is a camp?” So I will do my best to try and explain it!! A camp in South Louisiana is like a hunting cabin up north. Ours just so happens to float on water (like a house boat), others may be on land! Some are lucky to have electric while others have to use generators! Depending where the camp is located you can drive your car or you may have to take your boat! Ours will be a 30 minute boat ride!! Price range? Well that depends on who its for. I have seen come camps both on the water and land that are in the millions dollar range and some that are on a budge like ours!! We even have “homes” in some of the coastal areas that are called “camps” for their owners. We are very happy with the small, floating, budget friendly camp we are building to spend countless family time together!!!

Day One – Sunday
Raymond started by laying out the 6 floats where they will need to be! They are feet apart long ways and 5.5 feet apart wide. This makes a 24 x 20 base. Each float has two 4x6x12 beams attached to them with a two foot over lay front and back. After laying them out he squared everything off and maker where every hole had to be drilled out. We used 7in carriage bolts going through the beams and the pre-made holes in the floats. There is 10 bolts per float. Each float can hold 2800 pounds!!


Day Two – Monday
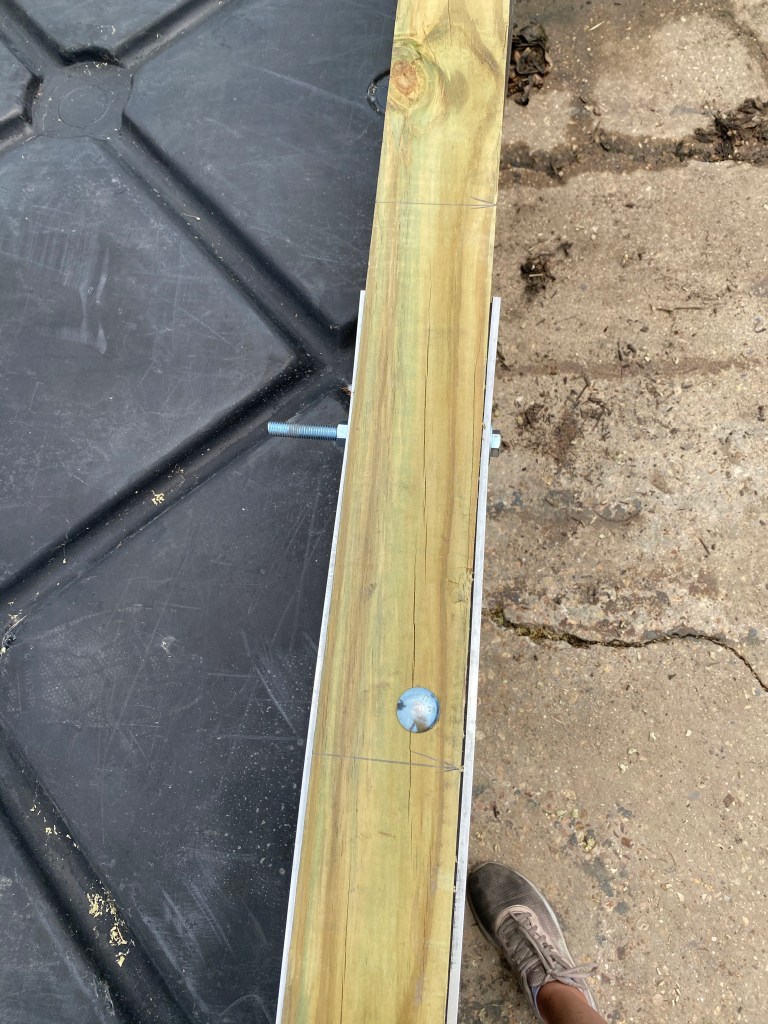
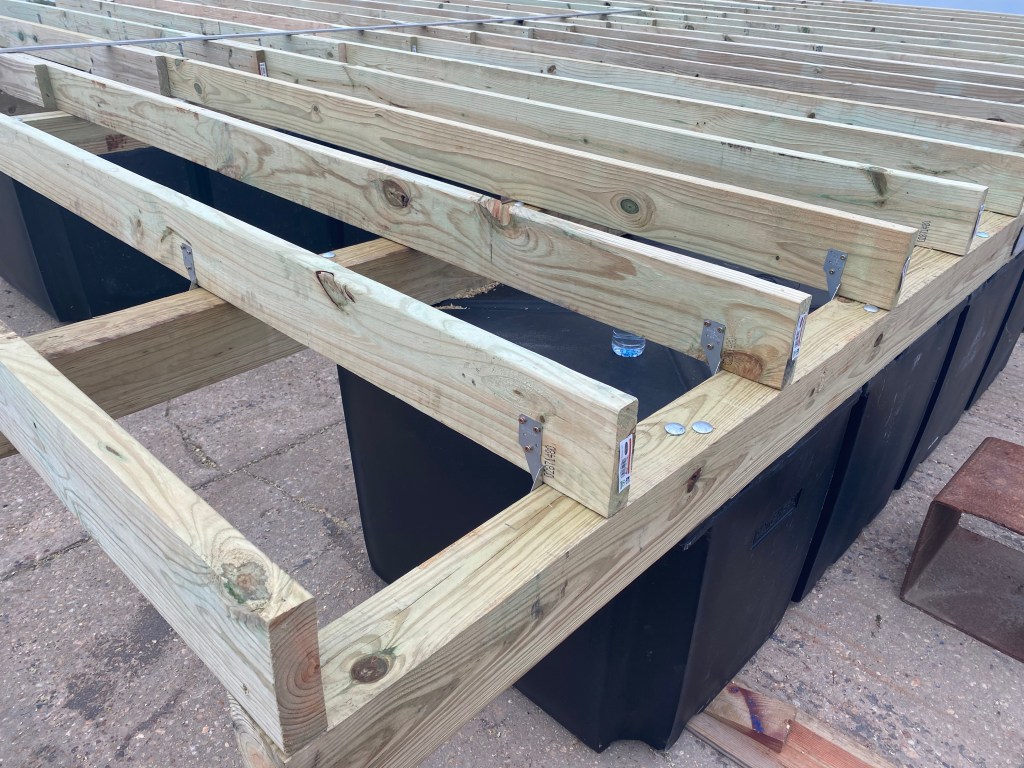
First thing he had to do was go get rubber to place in between the treated beams and the aluminum flat bar, the rubber keeps the treated beam from eating up the aluminum. We used 12(two for each beam) 10 foot 3in x 1/4 Aluminum flat to connect the front and back floats. This is to help from keeping the the middle joint from flexing. Each beam has 8 8in carriage bolts holding them together. The next step is to square off where the floor joist will go. They are 16ins apart. We used 38 – 2 x 6 x 12 board cut down to 10 foot. The 2 foot that was cut off was used to brace the boards together in the middle. Started on the joist hanger hurricane straps before it was quieting time!!


Day Three – Tuesday
Last full day before all the rain stopped the work for this time he is home!! 120 joist hanger hurricane straps each with 6 screws each were installed where the floor joist touched all 6 beams. Deadwood between the floor joist where the seams of the plywood will fall. Extra 4×6 braces were added too. 4×4 braces were placed in the middle to help the aluminum braces too. Last both of the 2 foot walk ways down the sides were installed.


Raymond has done an amazing job. He has done 75% of this work all by himself. He got help from some of the guys on the boat that has been at the dock and some help from a carpenter friend of ours. While Raymond will be on the boat we will have someone add another 120 joist hanger hurricane straps.
We are thinking it will take him another 3 times of him being home to be all done. Then its off to the lease so we can enjoy our second home!!!! We can’t wait!!!
